
And hello there, readers! My name is Angie and I am the artist, teacher and dreamer behind The Sunshine Memoir.
I explore the in-betweens of life, adventure and creativity and have been
itching to share some more of myself with the blog world! Before I begin, I must say thank you to the sweetest lady, Julie, for having me as a guest on
her blog!
With the end of Autumn nearing, it is our last chance for some Autumn Love! Our colourful, leaf-filled, golden days are
dwindling and I am excited to share a few ways to help you capture the magic of
Fall.
I
love to go for walks in the Autumn months to enjoy the continually changing
scenery before it disappears (much too quickly, right?!) The problem is, I find
myself wanting to hoard every leaf that I see- let’s call it the habit of all
collectors, shall we? Luckily, I have experimented with a few different
techniques that encourage leaf picking and will help to preserve them for
years.
I
have fond memories from my childhood of playing outside at my grandparent’s
house in the Fall. We gathered leaves together and would head to the basement where my Grandmother and I began the process of sealing the biggest maple leaves we could find between wax paper. And I thought,
wait… why am I not doing this every year? This seems like a very ‘me’ thing to
do!
Here
are the directions for this simple DIY:
WAX PAPER LEAFS
Materials:
Leaves (duh) *
Leaves (duh) *
Wax
Paper *
Iron
Scissors
Paper,
or thin towels
*
later in my process, I began to use small ferns and flowers as well
*
I started out with a no-name brand and it wasn’t working out well- be sure
to use a brand name wax paper!
Process:
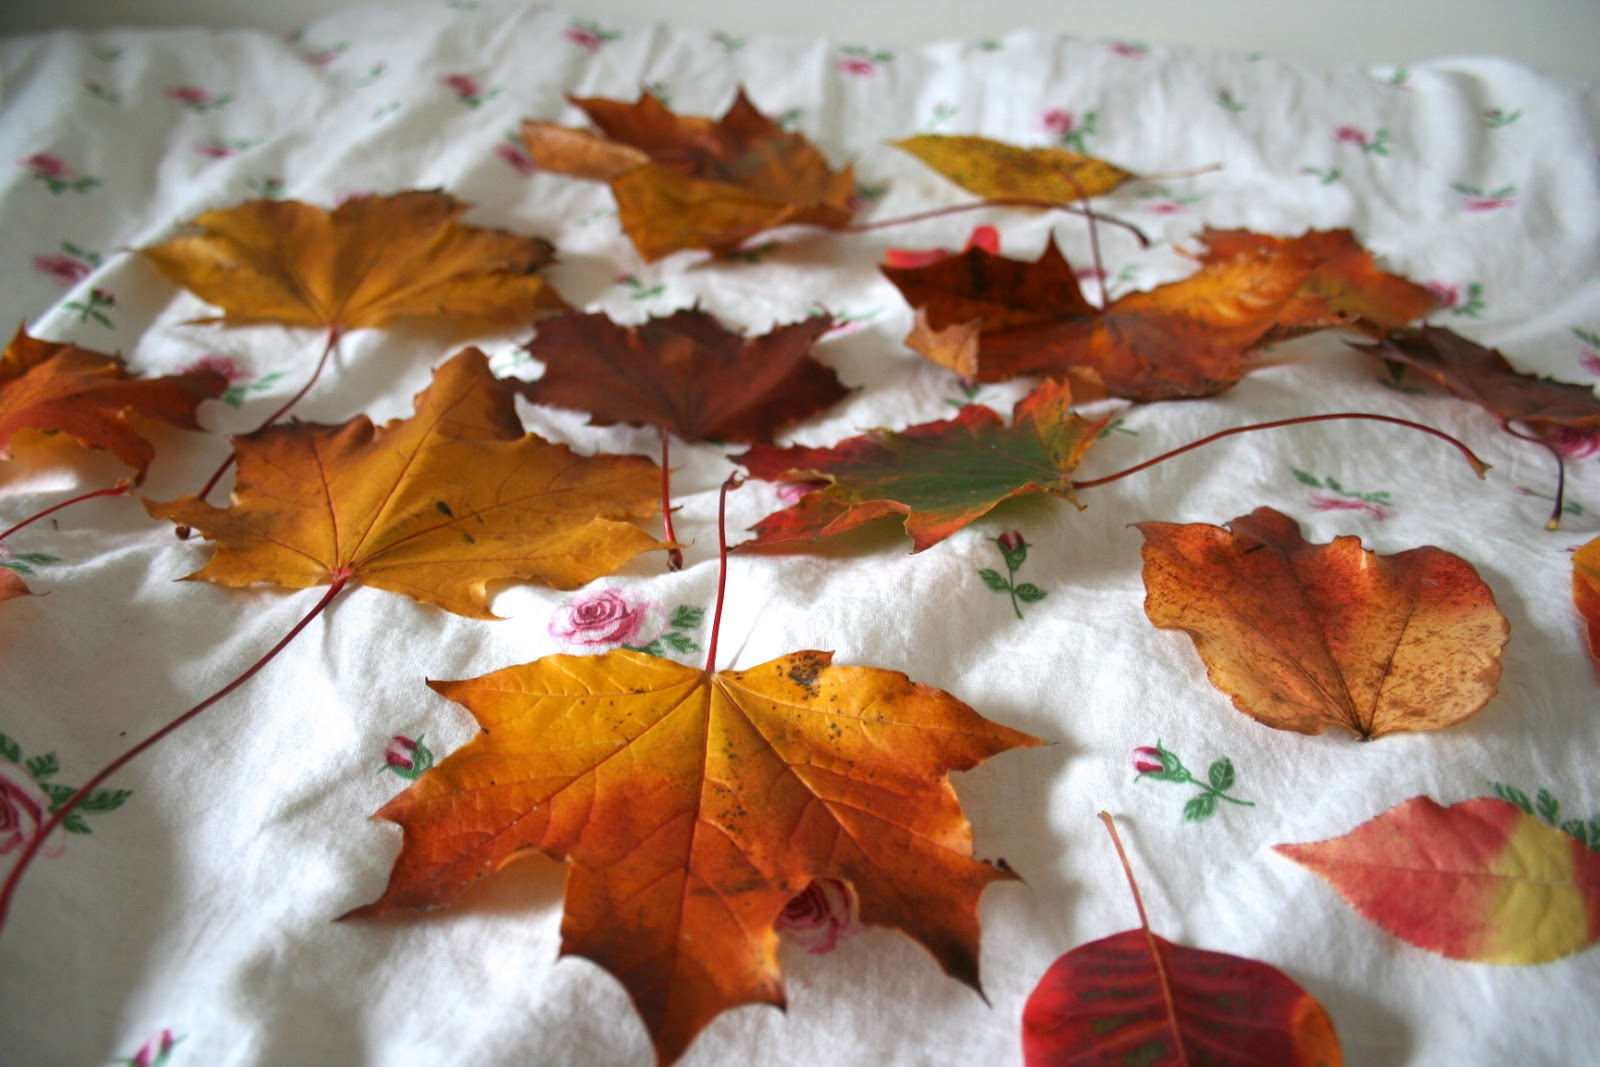
1. Gather your materials! Make sure not to pick
any dry leaves, as they will only crumble between your wax paper. Even though a
ton of leaves have fallen (in Toronto, anyway) you can pick them off the ground,
air dry them for a day to get the moisture out, and use them without any
issues. Make sure not to leave this project for a few days after you’ve picked
your leaves, or they will be too dry to use- as you can see in the photo below
(but hey, it forced me to go on another great walk!). Bring a paper or plastic bag with you on your leaf-hunting adventure and keep your eyes peeled for interesting shapes, texture and colours!

Assemble all of your materials at your workspace. Make
sure you have a hard surface to work on so you can apply some pressure with the
iron. I love to work in my room so I just grabbed a wooden canvas from my stock
as a strong base and used my bed as a work station. Also note- music, leftover
Halloween candy and furry friends are excellent companions for this process if
you are going at it solo! *If you are working with kiddos, please remember to be
safe with the iron!*


2.
Set the iron at a medium heat. Do not
use steam!
3.
Cut and fold your wax paper to size. Here’s
where some creative licensing happens. I figured out that I loved the look of
torn wax paper edges. You may want to keep it neat and straight.
4.
Place your leaf in the wax paper and fold
the top over. *NOTE! Your wax paper will naturally start to curl in towards
itself. That will indicate the waxy side of the paper. Place your leaf in
between that side.
5.
Iron over the wax paper. Any
tutorials I have seen encourage using a towel over the paper, but I felt it
worked just fine without one if your iron is on a low setting. After much
experimentation, I found it worked best to start at one end and using a slow,
pressured motion, iron in one direction over the paper. Moving the iron back
and forth sometimes overheats the wax and it will start to separate again. The
goal is to get a seal around the leaf- the middle section close to and over
your leaf will not cure together. You will need to get the hang of it (make
sure to pick plenty of leaves!), but once you have it, your leaves will be
sealed at a quick rate!

And
TA-DA! Your leaf or leaves are now preserved! Be warned, they are not clearly
visible through the wax paper. It is definitely a style in itself. You can,
however, place them on windows to allow the light to shine through and see your
leaf more clearly.


There
are two more simple ways to preserve your leaves:
LEAF
PRESSING

Finally,
my last method:
GLOSS
LEAVES
Simply
cover the backs and fronts of leaves with thick layers of our dear friend, Mod
Podge. Allow complete drying time between each layer, and try your best to
avoid gluing your leaf to its drying surface! Your leaves will be beautifully
glossy, completely malleable and can be hung, placed in a vase or frame, and
enjoyed for years!


I actually ended up loving the way the leaves turned out using the Mod Podge and wish I had made many more- they are shiny and stunning and can be stored for years (store between tissue paper to avoid sticking)! This preservation method is the easiest of the three and had such great results, so I definitely recommend it to everyone!
I
hope you have enjoyed my tutorials! If you have any questions, you can ask me on
this post or at my blog! I think this will be the start to a new tradition of
my own and I am so happy that I could share it with you all. It seems pretty
basic, but there is a lot of creativity involved in these processes and I
encourage you to take a walk, gather, and make something!

-Angie


Great ideas! I've been wanting to try pressing, but I'll have to wait until next year. Our leaves passed about 3 weeks ago and I miss them a lot, it would be wonderful to have them in my home year round.
ReplyDelete❤stephanie
What a nifty project! Thanks for sharing :-)
ReplyDeleteLove these ideas! I love the look of them with the wax paper held up against the window. So pretty.
ReplyDeletemy husband just leafed me for another man
ReplyDelete