Showing posts with label do it yourself. Show all posts

July 12, 2017

(tiny) patio makeover

Hello & Happy Wednesday! We made it half way through the week (and what a week it has been!) I couldn't be happier to be at home snuggled on the couch watching movie (Perks Of Being a Wallflower) WHY is this the saddest movie ever?

I wanted to share some photo's of our recent patio makeover! It was one of the bigger projects we wanted to complete after we bought our house. Believe or not, this is considered a pretty decent sized patio for Toronto standards. 

Pete and I love hosting as I'm sure you've gathered by now. We wanted a perfect little spot where we could sit out back with a drink, a book, a coffee or just each other and enjoy some outdoor time!

Pete worked with my awesome Step-Dad Blair to make this custom bench and table with us. Since we didn't have a lot of space to work with we measured it up and did a sketch of what we pictured. I am legit over-the-moon excited with how it turned out, and Pete and I are LOVING spending time out there and having friends & family over. Now if we'd stop getting all of this rain, hopefully we will spend even more time for the remainder of the Summer. Below are some photo's I snapped:

//  B        E         F        O        R         E
// A         F         T         E         R

March 29, 2015

Celebrate Every Day - DIY Confetti Packets!

Well, Happy Sunday Beautiful! I hope your day was absolutely magical. I definitely had an awesome day (and weekend.) Over the past week I've realized a few things, and one of them is that every single day is a celebration. When it really comes down to it, not everything is ever going to be perfect, and maybe we don't always get everything that we want - but if you're healthy, and you've got a home, and a job, and people to love and people who love you...then you're truly lucky. Sometimes things need to happen for us to realize this, and it is always a good reminder.

Now, I am sure you've noticed that I really like celebrations! I like sparkles, and paper straws, pretty napkins, confetti, party hats, treats bags and any added touch to make a party special. I recently got a giant bag of sparkly confetti, and thought I really ought to make some confetti packets!
What you'll need:
  • a giant bag of confetti
  • mini clear goodie bags
  • a stapler
  • plain brown labels
  • felt tip pen
  • the will to cover your home in confetti
// took my giant bag of confetti, and stuffed each about three quarters full
// shake em off to get the confetti packed down and looking cute as can be
// fold bag in half and staple both sides down
// write a cute word or phrase on a label and stick it on!
// i usually add some washii tape over the top in the end too!

September 29, 2014

Do it yourself - Treat Bags!


So, my cute-as-can-be niece Ivy turned 3 a few weeks ago! As soon as we decided the date of the party and everything, I asked my bro & sister-in-law if I could help by creating a little bit of cute. So, making treat bags for 3 year olds is definitely not the easiest task, because they are still little itty bitty humans and maybe aren't all in to the same things as each other. I wanted to keep the treat bags unisex for the most part.

We had about fifteen 3 years olds and then two 6-8 year olds who I made custom treat bags for (hello kitty notebook, candy necklace, and go fish/crazy eight countdown)

So for the treat bags, I wanted them to be really fun and cute but didn't want to spend a fortune so in the end I think they were just less than $5 each!

Inside each treat bag was ;
♥ a candy necklace
♥ a few little plastic dinosaurs
♥ five crayons
♥ a monster finger puppet
♥ froot loop fruit snacks
♥ hello kitty or transformer stickers

The treat bags were a total hit and the cutie babes loved them! I got all the supplies at target (duhhh) and of course customized them with mini tags saying "ivy's 3rd birthday" with a little washi, and then wrapped them up with ribbon!


September 12, 2014

Perfect Pastel Baby Shower!

TGIF! Happy Friday to you all ♥

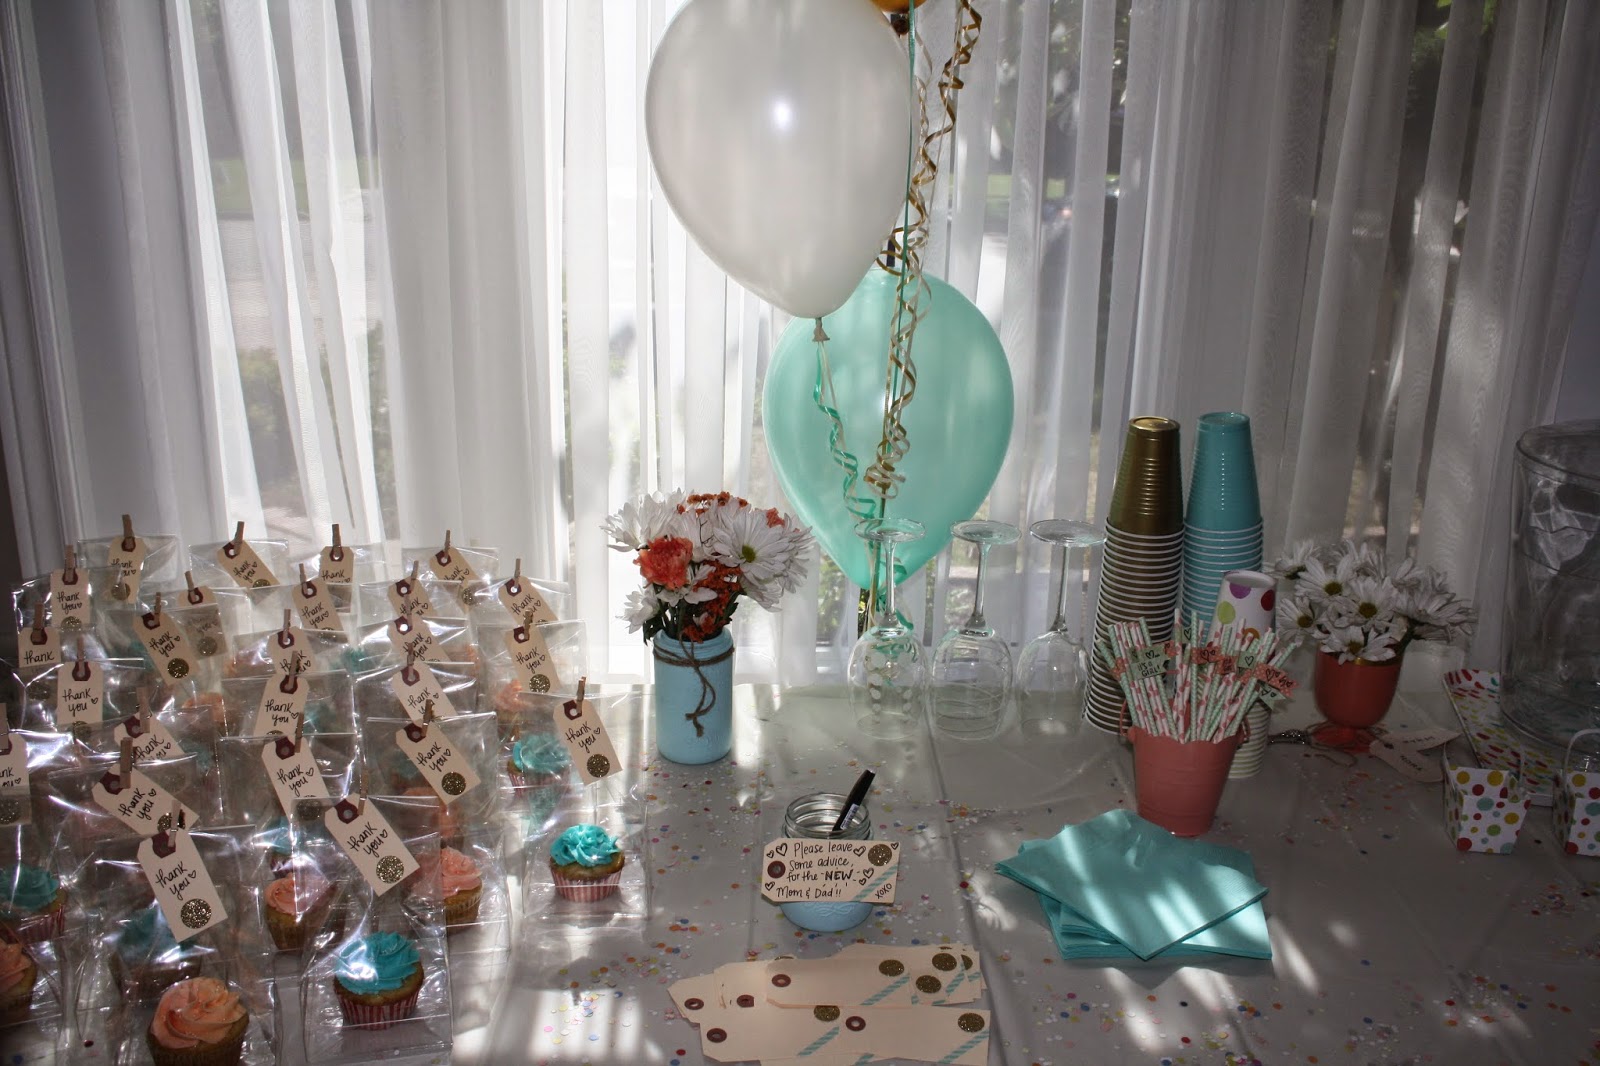
One of my besties asked me to help her plan her sisters baby shower. Of course I jumped at the chance to put my creative mind to work! The colours we chose were coral, mint green, sky blue and gold! Oh the most perfect combination!

Sarah's Dad wanted to do cupcakes as the party favour (how cute is that?) and since I also bake cupcakes I did those too. I decided to just do a simple "thank you" tag, hand written with a cute little gold glitter dot! I attached them with the cutest little clothes pins! 

Other added touches for the celebration table :
♥ Confetti
♥ Hand painted mason jar with flowers in it
♥ Paper straws with custom flags
♥ Balloons, because they are so essential
♥ Tags for advice cards for the Mom & Dad

I love sticking to a colour theme and not the classic blue for a boy and pink for a girl. This looked so pretty and fun and people were gathered around the table and taking it all in. We also made a delicious pink lemonade punch!

Hopefully in the future I can start planning more events and parties and putting the "cute by jules" touch on them! Enjoy & Happy weekend!

I am heading to Blog Podium tomorrow, so excited.

February 9, 2013

valentine DIY notebooks!

happy saturday my loves!
i've had the busiest/craziest week. more about this later, but for now work is finally done & i am so happy to say i am currently snuggled up on the couch watching hockey. [swoon]

i just wanted to post the cutest, easiest DIY ever!
i found these adorable polka dot notebooks at homesense, they came in a pack of 3 for $6 and i thought they were absolutely precious. i am also so in love with homesense.

i just thought this was a cute & crafty (and inexpensive) valentine gift to make for someone.

what you'll need
- mod podge (sparkly is best! obvs)
- a paint brush
- notebooks
- glue stick
- vintage valentines, or any cute valentine

i found these cutie valentines at the antique market, at st.lawrence market. the guy sold them 2 for $1, i got them last year and knew i wanted to use them for something but i wasn't sure what. i wish i got all of the ones he had because they were all absolutely adorable. these ones are from the 1950's and even had messages on the back! SO cute, i die for them.

// all you have to do -
glue your valentine of choice on the notebook with a glue stick,
smooth it out, paint the valentine with mod modge,
let them try over night,
put them in between some big books for a few hours to keep the print flat.

& THAT'S IT! how sweet right? i am going to send one of these to a friend and maybe i will have to keep one too. also, i just want to note these weren't bought in february so i didn't break one of my goals. hahaha, love it. let me know if you are making any cute valentine's day crafts, they are my faves.